Table of Contents
- Overview
- Index and Accessories
- Payment Device Features
- Step 1 - Turn On the Device
- Step 2 - Opening device menu
- Step 3 - Configuring Wi-Fi
- Step 4 - Registering the Device
Overview
Welcome to the NMI M02X quick start guide! This guide will walk you through the steps needed to set up and register your Miura M02X payment terminal, ensuring you can start accepting payments securely and efficiently.
The M020 is a new, uniquely versatile point-of-sale payment terminal that can be used in virtually all retail environments. Accepting all types of EMV payments, the M020 sets a new standard for countertop, tableside, and even mobile POS.
Note: Miura M020 devices are currently supported only in the United Kingdom. They are not available for use in the United States.
Index and Accessories
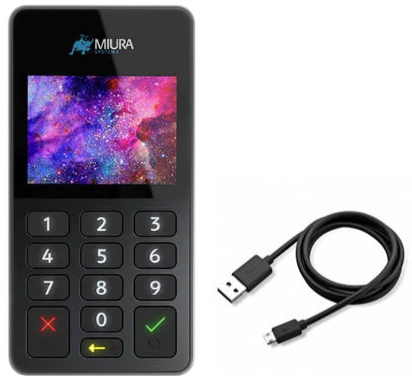
Your device bundle includes:
- 1 Miura M020 card reader
- 1 USB-A to micro-USB charging cable
Payment Device Features
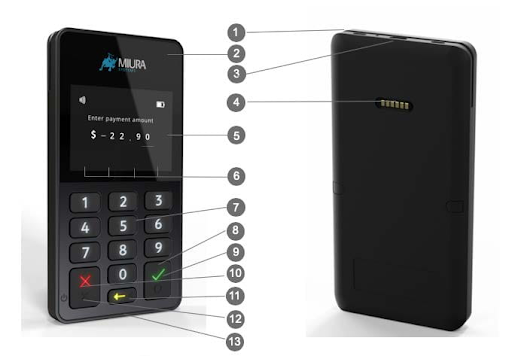
- Magstripe card reader
- Charging LED (red/green)
- USB connector
- Charging cradle contacts
- Colour TFT display
- NFC Indicators
- Keypad
- Enter Key
- Function key for Bluetooth and WiFi
- Clear key
- Cancel key
- Power button
- Chip card reader
Step 1 - Turn On the Device
First, you will want to power the device on by holding the red "X" button on the device for 4 seconds.
Note: If nothing happens ensure the device is charged.
Step 2 - Opening device menu
Now that the device is powered up we will configure the Wi-Fi. Press the yellow left-arrow button to get to the device menu.
Note: If network is already setup, you may have to restart the device and press the Yellow button before the devices connects to the internet in order to bring up the menu.
Step 3 - Configuring Wi-Fi
Select "Wi-Fi Config" then "Add Network". The device will scanning for Wi-Fi access points. Select your Wi-Fi and it will then prompt you to enter in your Wi-Fi password.
Note: On the "Add Network" screen, at the bottom of the list there will be a "Hidden Network" option where you can manually enter in a hidden SSID to be used, though this only works on later MPI releases.
Step 4 - Registering the Device
You have two options for registering your device: Manual Registration through the NMI Merchant Portal or API Registration using the Customer Present Cloud API.
Manual Registration
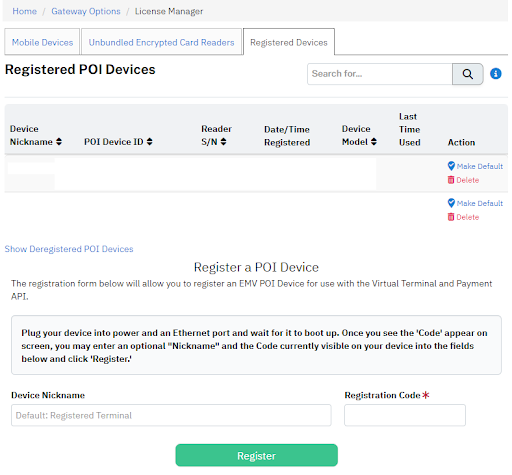
- Log in to your Merchant Portal: Access your NMI account online.
- Navigate to Registered Devices: Find this section under the license manager.
- Enter the registration details:
- Device Nickname: Choose a name to easily identify your device.
- Rotating Code: Enter the code displayed on your Lane 3600 screen.
- Complete registration: Your device will now be registered and ready to perform EMV transactions in the virtual terminal.
API Registration
For more advanced integrations, consult the Device API - Cloud documentation. This guide will provide detailed instructions on how to use the API for device registration.